| [ Team LiB ] |
|
Recipe 3.11 Make a Vertical Line the Same Height as a CanGrow/CanShrink Control3.11.1 ProblemYou have a control on a report that has its CanShrink and CanGrow properties set to Yes so it can grow or shrink to accommodate different amounts of text. You placed a vertical line to the left of the control, and you want it to be the same height as the control. Is there a way you can synchronize the height of the two controls? 3.11.2 SolutionIf you place a line on a report using the Line tool, it will always be the same size. To make a line change its height to match the height of another control (or group of controls), you need to use the Line method in a procedure attached to the Print event of a report section. This solution uses the Line method to make a line whose height varies to accommodate the changing height of a text box that displays a memo field. Follow these steps to add to your own report a vertical line that shrinks or grows to match one or more CanShrink/CanGrow controls in a section:
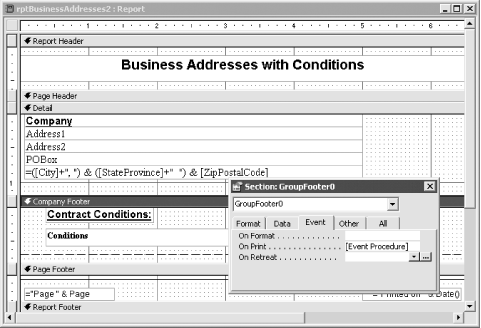
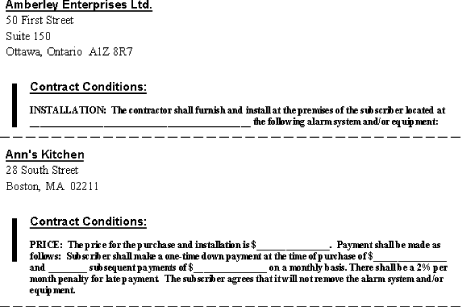
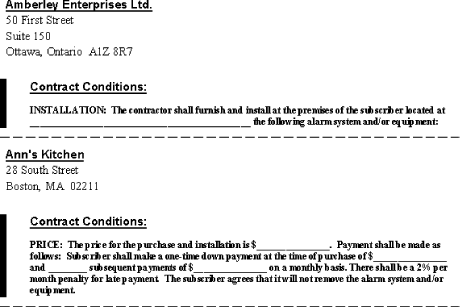
Figure 3-25. rptBusinessAddresses2 in design view To see an example of this solution, load 03-11.MDB. Open rptBusinessAddresses1 in preview view (Figure 3-26). This report lists business addresses and contract conditions. Notice that the line in the company footer section is of fixed height and does not vary to match the height of this section. Figure 3-26. This report contains a fixed-height line next to a variable-height text box Now open rptBusinessAddresses2 in preview view (Figure 3-27). This version of the report contains a line whose height matches the height of the company footer section. Figure 3-27. A report with a programmatically created variable-length line 3.11.3 DiscussionThe event procedure uses the Line method to create a line that starts at the top of the lblConditions label and extends to the bottom of the txtConditions text box, growing and shrinking in proportion to the text box. You can use the Line method to draw lines or rectangles on reports using the coordinates you specify (sngLineHeight through sngLineWidth in the sample procedure). The event procedure sets the sngLineTop argument to the top of the lblConditions label, sngLineLeft to 0, sngLineWidth to 100, and sngLineHeight to the bottom of the txtConditions text box. Because Access does not provide a VBA Bottom property for controls, this value is calculated by adding the text box's Height property to its Top property, using the following piece of code (which makes use of the VBA With...End With construct): With Me.txtConditions
sngLineHeight = .Top + .Height
End With
The line itself (actually, a rectangle) is drawn by the following line of code: Me.Line (sngLineLeft, sngLineTop)-Step(sngLineWidth, sngLineHeight), , BF where the variables in the first set of parentheses define the upper-left corner of the rectangle and those in the second set of parentheses define its width and height. The reserved word Step allows you to use height and width values for the rectangle instead of specifying the lower-right corner. The last argument, BF, indicates that the line will be a rectangle (B) instead of a line and that it will be filled with the same color as its border (F). The ScaleMode property specifies the unit of measurement. Because Access uses twips as its measurement unit, this property is generally set to twips, as in the acbcSMTwips constant in the sample code. The available settings are listed in Table 3-9.
The DrawStyle property specifies the line type; it is set to Solid in the sample code using the acbcDSSolid constant. The available settings are listed in Table 3-10.
|
| [ Team LiB ] |
|