|
|
< Day Day Up > |
|
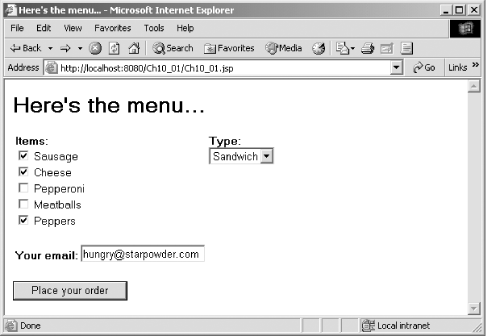
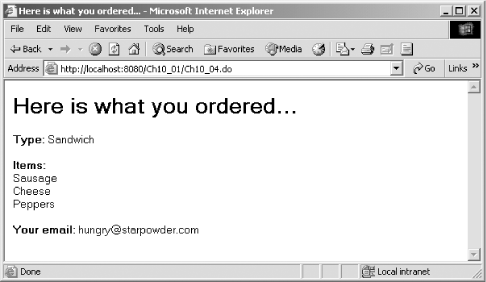
10.1 Struts and EclipseWe'll start by taking a look at the Struts example we're going to create using Eclipse, using the latest version of Tomcat available (Version 4.1.29 as of this writing), and the latest version of Struts (Version 1.1). When you navigate to the opening JSP, http://localhost:8080/Ch10_01/Ch10_01.jsp, you'll see a menu with a number of HTML controls, as appears in Figure 10-1. Figure 10-1. The opening view of the Struts application The user can order a pizza or sandwich using the controls here and can also include his email address. Clicking the "Place your order" button sends the data in the form to an underlying bean and to the application's controller servlet, which displays a summary of the order, as you see in Figure 10-2. Although these results look pretty simple, that's not to say that the implementation of this application is easy. Struts is not a lightweight framework; to create this example, you use these files, arranged in the Tomcat webapps/Ch10_01 directory: webapps
|
|_ _Ch10_01
| Ch10_01.jsp [View: Starting form]
| Ch10_05.jsp [View: Summary form]
|
|_ _WEB-INF
| struts-config.xml [Struts Configuration File]
| Ch10.tld [Custom Tag Definitions]
| Struts TLD files [Struts Tag Definitions]
| web.xml [Application Descriptor File]
|
|_ _lib
| struts.jar [Java Archive of Struts Classes]
|
|_ _classes
| ApplicationResources.properties [Contains property data]
|
|_ _org
|
|_ _eclipsebook
|
|_ _ch10
|_ _Ch10_02.class [Custom Tag 1 Implementation]
Ch10_03.class [Custom Tag 2 Implementation]
Ch10_04.class [Controller: Action servlet]
Ch10_06.class [Model: Form bean]
Figure 10-2. The Struts application's summary
The next step is to create this
application using Eclipse. To follow along, create a simple Java
project named Ch10_01, and create a new folder in
the Tomcat webapps directory,
Ch10_01. To get access to this folder in
Eclipse, create a new folder by right-clicking the project and
selecting New deployment
|
|_ _WEB-INF
|
|_ _lib
|
|_ _classes
To handle the compiled output of this
project, select the Project
In this case, we purposely
didn't create a src directory
to hold the source code when creating this project as we have in the
past, in order to demonstrate that it's easy enough
to create a source code folder after a project has been created. To
create a new source code folder, right-click the project and select
New Now add servlet.jar to the build path (it's in the Tomcat common\lib directory), as well as the Struts support JAR file, struts.jar. You can get struts.jar free at http://jakarta.apache.org/struts/ in compressed format (the current version is 1.1). Unzip or untar the download to get struts.jar, and place that file in the application's lib directory. Besides struts.jar, we'll also need these JAR files from the download in this example, so place them in the lib directory as well:
You'll also need these Struts .tld (Tag Library Definition files) from the download in the application's WEB-INF directory; these files support the custom tags that Struts uses:
To
get started with the code for this example, right-click the new
folder and select New |
|
|
< Day Day Up > |
|