DekGenius.com
Previous Section  < Day Day Up >  Next Section

5.3 Configuring Ant in Eclipse

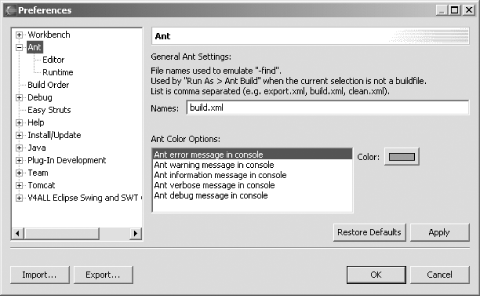
Eclipse also lets you configure its internal version of Ant. To configure how Ant will run, select Window Preferences, followed by the Ant item, as shown in Figure 5-7. In Eclipse, you don't need to name your build file build.xml; Ant will try to guess which file is the build file (the build file does need to be an XML file, with a name that has the extension .xml). You can help Eclipse out by giving an alternate name, or a list of names, in this dialog.

Figure 5-7. Configuring the build file
figs/ecps_0507.gif

You can also set Ant runtime options by selecting the Runtime node, as shown in Figure 5-8. For example, to use a more recent version of Ant in Eclipse (Eclipse 2.1.1 comes with Ant 1.5.3, but the latest version of Ant, as of this writing, is 1.5.4, and Version 1.6 is out in beta; you can get alternate Ant versions directly from Apache at http://ant.apache.org), select the Runtime item and change the JAR entries you see in Figure 5-8 to the new versions of ant.jar and optional.jar. You can also set Ant variables like ANT_HOME in this dialog.

Figure 5-8. Configuring Ant in Eclipse
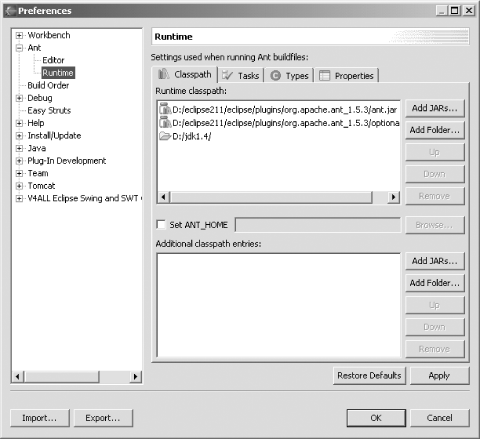
figs/ecps_0508.gif

You can add new Ant tasks and types with the Tasks and Types tabs, which means that those tasks and types will be available to build files without having to use Ant taskdef or typedef elements. Eclipse also lets you set global Ant properties if you select the Properties tab in this dialog. To add a new global property, click the Add button in the Properties tab, and enter a name and value for the new property.

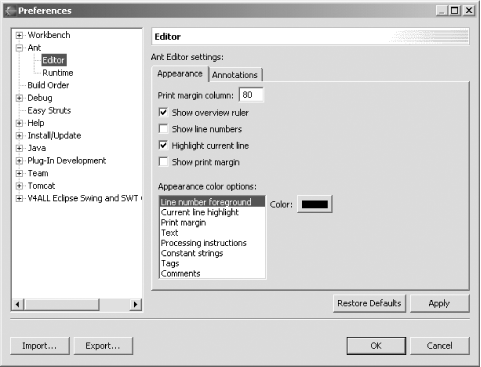
You also have limited control over the Ant editor's options using the Preferences dialog and selecting the Ant Editor item. The Ant editor is actually little more than a simple XML editor, but you can specify such items as the colors used in syntax highlighting, or whether the editor shows an overview ruler, as you see in Figure 5-9.

Figure 5-9. Configuring the Ant editor
figs/ecps_0509.gif

The Ant editor also offers code assist. For example, if you enter < and then pause in typing, code assist will give you a list of possible Ant build file elements. Entering additional letters narrows down the list—for example, entering <p makes code assist give you the choice of <path>, <patternset>, and <property>. Code assist will also list possible attributes of Ant elements; just click inside the opening tag of an Ant element and press Ctrl+Space. Also, letting the mouse cursor rest on one of the items in the code assist list makes Eclipse display an explanation of what that item does. For example, the explanation for the property element is "Sets a property by name, or a set of properties (from file or resource) in the project."


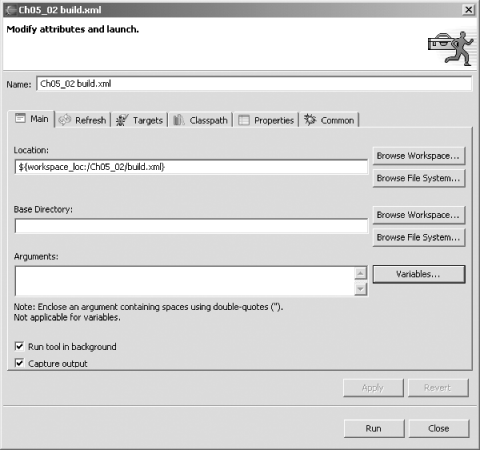
You can also configure Ant when you're about to run it, before selecting an Ant target to build. Right-click build.xml, select Run Ant, and click the Main tab in the dialog that opens, as shown in Figure 5-10. You can set the location of the build file you want to use here, as well as the base directory for the build. You can also set Ant arguments in the Arguments field.

Figure 5-10. Setting the run configuration
figs/ecps_0510.gif

You can also run Ant as an external tool: select Run External Tools External Tools, click Program, click New, and enter the name you want to give to the external version of Ant. To fill in the Location field, click Browse File System and find the correct file for your operating system (for example, ant.bat in the Ant bin folder in Windows). In the Working Directory field enter the directory of your build file, and click to execute your build file.


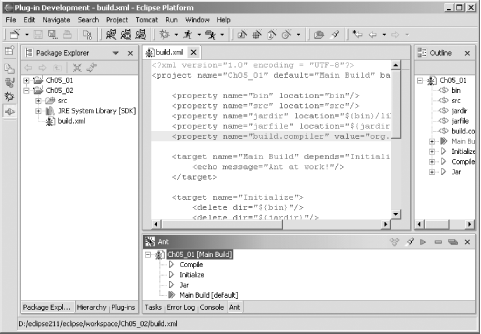
In addition, there's also an Ant view in Eclipse, which you open with Window Show View Other Ant. This view provides an Ant-based overview of build files; to add a build file to this view, right-click the view, select Add Buildfile, and navigate to the build file you want to display. The view will display a breakdown of the build file, as you see in Figure 5-11, and you can run various Ant targets by right-clicking them and selecting Run.

Figure 5-11. The Ant view
figs/ecps_0511.gif
    Previous Section  < Day Day Up >  Next Section