|
|
< Day Day Up > |
|
6.1 OpenOffice.orgOpenOffice.org is a desktop suite that functionally resembles Microsoft Office. That is, OpenOffice.org can perform many of the functions performed by Microsoft Office and includes many of the familiar features of Microsoft Office, along with a few features not found in Microsoft Office. The distinctive advantage of a desktop suite is that its component applications are designed to work together. The applications of a desktop suite have a similar look and feel, which makes them easy to learn and use. Linux users have long had access to applications that help them prepare documents. However, development of Linux desktop suites has lagged behind that of Microsoft Office. The applications and suites have tended to be somewhat clumsy to use, unreliable, and poor in features. OpenOffice.org sets a new standard for Linux desktop suites, providing features and capabilities that are adequate to satisfy most computer users, not merely Linux fans. OpenOffice.org began as a commercial desktop suite known as StarOffice, created by StarDivision. When Sun Microsystems acquired StarDivision in 1999, Sun soon thereafter released a freely available version of StarOffice. More recently, Sun has made certain StarOffice technologies available to the open source community, which created the freely redistributable OpenOffice.org desktop suite. Sun plans to continue development of StarOffice, which is a component of Sun's Java Desktop System, as a commercial product. At the same time, the open source community plans to continue development of OpenOffice.org. OpenOffice.org is a multi-platform product, and is currently available for Linux, PPC Linux, Solaris, Windows, and Mac OS X (under Apple's X11). Work is underway to support other platforms, including FreeBSD, OpenVMS, and IRIX. OpenOffice.org is also a global product, currently supporting 32 languages. Support for new languages is added regularly. OpenOffice.org includes translation filters that let you share documents with users of Microsoft Office and other popular applications. It also includes convenient features such as Print to PDF (Adobe Portable Document Format); AutoPilot, which assists you in creating complex documents; and Stylist, which helps you take control of the look of your document. OpenOffice.org includes word processor, spreadsheet, graphics, presentation manager, and drawing applications. The next several sections describe these applications. You can learn more about OpenOffice.org at http://www.openoffice.org. 6.1.1 Writer: The OpenOffice.org Word ProcessorWriter is available via the Office menu item of the GNOME and KDE menus and, still more conveniently, has its own panel icon, which resembles a pen superimposed on two sheets of paper. When you launch Writer, you'll see a window resembling that shown in Figure 6-1. Figure 6-1. Writer: the OpenOfice.org word processor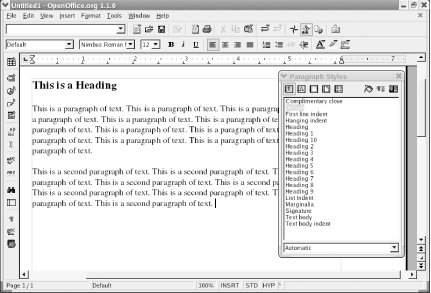 If you're launching Writer for the first time, a dialog box invites you to register as an OpenOffice.org user. Your registration is invitedand appreciated by the developers of OpenOffice.orgbut not required.
Ifas is likely the caseyou've used
Microsoft Word or another word processor, you'll
find Writer's user interface intuitive and easy to
use. You can type text in the middle area of the window. To style
text, highlight the text and double-click on a style in the
Stylist. The stylist is the window
titled Paragraph Styles that appears in Figure 6-1.
If the Stylist is not visible, you can summon it by pressing F11 or
choosing Format As mentioned, Writer includes many impressive features, some of which
are available to users of Microsoft Office only at significant cost.
For instance, Writer makes it simple to create PDF documents. To
create a PDF document, prepare and save your
document as usual. Then choose File Figure 6-2. The Printer Setup dialog box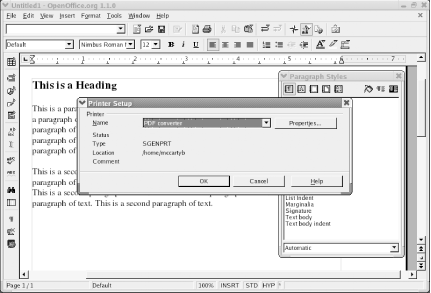 Choose PDF converter from the Name list box and click OK. Then,
choose File Here are some other Writer features you may enjoy exploring and using:
To sample Writer's ability to work with documents prepared using Microsoft Word, I opened a draft version of chapter 4which was converted from DocBook to Microsoft Wordin Writer. In editions of this book published prior to the advent of OpenOffice.org, Linux word processors were not fully up to this challenge. They generally mangled the manuscript and sometimes crashed. Writer, however, did not balk. The only problem I found was that several unnumbered lists were erroneously converted to numbered lists. This problem took only a few seconds to fix. 6.1.2 Calc: The OpenOffice.org SpreadsheetLike Writer, Calc is available via the Office menu item of the GNOME and KDE menus. It too has a convenient panel icon, which resembles a pie chart superimposed on a tabular spreadsheet. Calc's main window appears in Figure 6-3. Figure 6-3. Calc's main window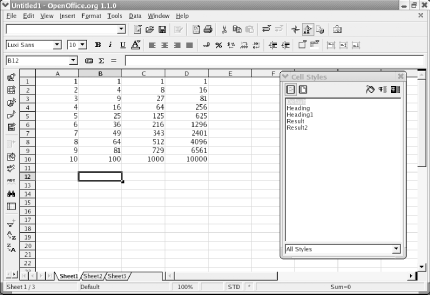 Just as Writer resembles Microsoft Word, Calc resembles Microsoft Excel. In particular, the language used in writing cell formulas is similar to that used by Excel. Moreover, the resemblance between the products is not merely syntactic. If your fingers are so accustomed to Excel that they race to perform operations in the familiar way, disaster will not likely ensue: many of Calc's keyboard shortcuts are identical to those used by Excel. You may need to look up from the keyboard to realize you're using Calc rather than Excel. Like Excel, Calc can produce tables, graphs, and charts. Like other
OpenOffice.org applications, Calc can send your work product to a
printer or write it as a PDF document. Again, like Writer, Calc can
obtain data from databases and other external sources. Choose View Here are some interesting Calc features for you to explore:
6.1.3 Draw: The OpenOffice.org Drawing Program
Draw is the OpenOffice.org drawing program,
available via the Office submenu of the GNOME and KDE menus. Unlike
its sister programs Writer and Calc, Draw has no panel icon. Launch
Draw by choosing Office Figure 6-4. Draw's main window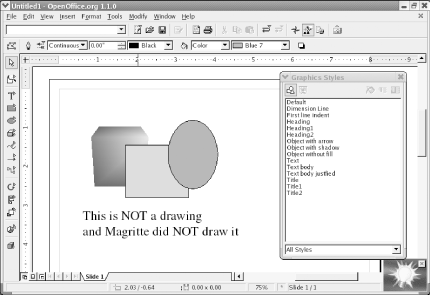 Draw enables you to draw two- and three-dimensional objects, and specify their color and other characteristics. Using Draw, you can move, align, and manipulate your objects to arrive at a complete composition. You can use Draw to create graphics that you incorporate into documents prepared using other OpenOffice.org applications, such as Impress, the presentation manager. You can save your work product as a GIF, JPEG, PNG, or in many other popular graphics formats. The GIMP (Gnu Image Manipulation Program), also included in Red Hat Enterprise Linux and Fedora Core, is a more sophisticated drawing program. However, Draw integrates smoothly with other OpenOffice.org applications. So, you may find it the more convenient tool for graphics of everyday complexity. Here are some fun operations to try out:
6.1.4 Impress: The OpenOffice.org Presentation ManagerImpress is OpenOffice.org's presentation manager, which functionally resembles Microsoft PowerPoint. Impress is available via the Office submenu of the GNOME and KDE menus. Impress has a convenient panel icon, which resembles a slide superimposed on a bar chart. Figure 6-5 shows Impress's main window. Figure 6-5. Impress's main window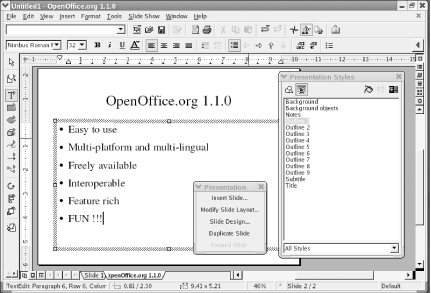 When you launch Impress for the first time, it fires up AutoPilot to lead you through creating a presentation. You can manually launch AutoPilot from the File menu. AutoPilot lets you specify the presentation medium (paper, slides, and so on), and select a presentation template, slide design, and slide transition appropriate for your presentation. Currently, Impress is distributed without templates. A few templates are available on the OpenOffice.org web site, http://www.openoffice.org. However, Impress also lets you model a presentation on an existing presentation. Until a variety of templates is available, you'll likely find this capability useful and convenient. When the AutoPilot is finished, Impress pops up a small dialog box titled Presentation. To create a slide, click Insert Slide, which brings up the Insert Slide dialog box shown in Figure 6-6. This dialog box is the main means of creating the slides that comprise a presentation. Select the desired layout and click OK. An empty slide appears in the window, ready for your customization. Figure 6-6. The Insert Slide dialog box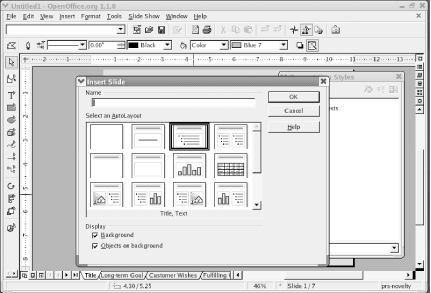 Impress is not as featureful as Microsoft PowerPoint. In particular, it lacks support for video clips. However, many experts believe that overly sophisticated presentations can work to the disadvantage of the presenter. Impress is more than adequate to create simple and clear presentations that help you communicate persuasively. Impress includes the FontWork and 3D Effects tools explained in the section on Draw, as well as other facilities common to many OpenOffice.org applications. Here's some fun you can have with Impress:
|
|
|
< Day Day Up > |
|

 Stylist.