|
|
< Day Day Up > |
|
11.2 Using the Plug-in Development EnvironmentThe Eclipse platform is already a conglomeration of over a hundred plug-ins, and they build on each other using extension points. An extension point lets one plug-in build on what another plug-in exports. In this chapter, we're going to use extension points to add new menus, buttons, and so on to Eclipse in a plug-in.
Using the Eclipse Plug-in Development Environment (PDE), you can build plug-ins that will build on the standard extension points available. Here are the types of plug-in projects that the PDE will create for you:
The
PDE has a number of built-in Wizards, and we're
going to make use of that support in our next example. This example
will create a simple plug-in that supports both a menu item and a
button in the toolbar. To create the plug-in project, select
File Figure 11-2. Creating a plug-in project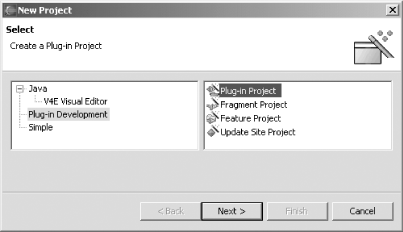 In the next pane, name the project org.eclipsebook.ch11.Ch11_01, as you see in Figure 11-3, and click Next. This project name will also be the ID of the plug-in when it comes time to use it in Eclipse. Figure 11-3. Naming the project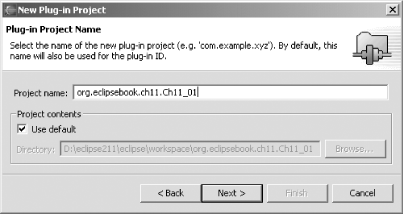 In the next pane, make sure the "Create a Java project" radio button is selected, as you see in Figure 11-4, and click Next. Figure 11-4. Setting the project type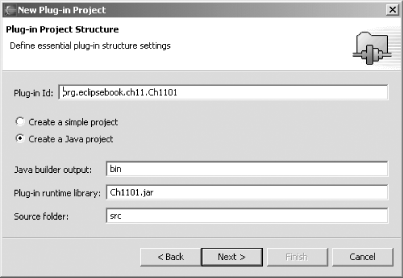 The next pane is the Plug-in Code Generators pane, shown in Figure 11-5. We're going to select the built-in "Hello, World" example here, so select the "Hello, World" item in the left box and click Next. (This pane also allows you to create other types of plug-in projects, such as plug-ins with editors, views, and so on.) Figure 11-5. Creating a Hello, World example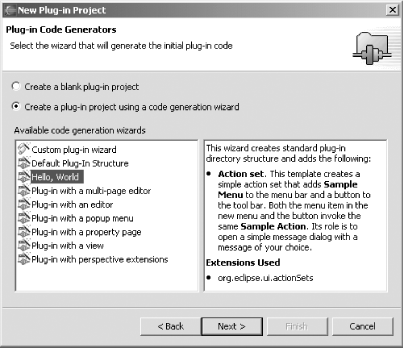 In the following pane you can configure the plug-in. Enter a provider namewe'll use Eclipse Bookand accept the other defaults, which appear in Figure 11-6. Click Finish to create the code for this plug-in (clicking Next here would let you set the text the plug-in displays in its message box, but the default text is fine). Figure 11-6. Configuring the plug-in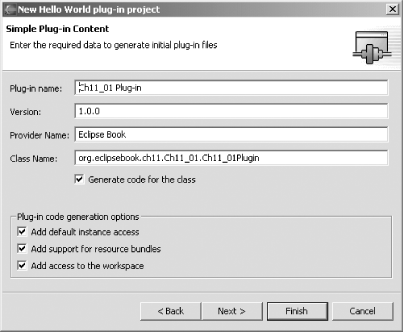 Clicking Finish opens the plug-in manifest editor, as you see in Figure 11-7, where it's displaying a Welcome page. You can open the editor later yourself by double-clicking plugin.xml in the Package Explorer. Figure 11-7. The plug-in manifest editor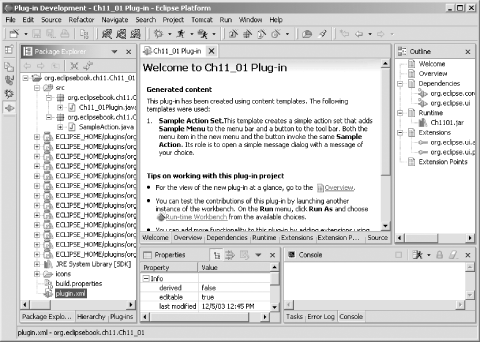 The plug-in manifest editor looks simple, but there's a lot going on here. Note, in particular, the tabs at the bottom of the editor:
The manifest editor lets you edit plugin.xml, either directly by clicking the Source button, or by using the various tabs in the editor. For example, to build on the standard extension points, you can click the Extensions tab and use the Add button to add functionality to your plug-in, as we'll do later in this chapter. When you make changes this way, the PDE edits plugin.xml for you automatically, saving you the trouble of editing raw XML. |
|
|
< Day Day Up > |
|

 New
New