|
|
3.2 Tables in Standard View In
Dreamweaver's Standard
view, you can create and manipulate tables using the well-known
paradigm of rows and columns. Switch to Standard view using the
Standard View button in the Objects panel
or by choosing View Entering Standard view simply sets the drawing mode; the next step is
to insert a
table using
Insert
Figure 3-1. The Insert Table dialog box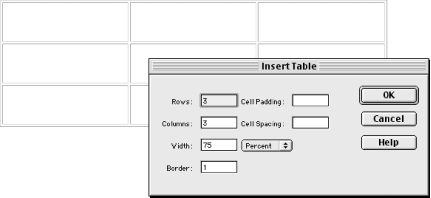 3.2.1 Selecting Table Items in Standard ViewThere are several ways to select tables, cells, rows, and columns in Standard view. The following discussion applies to Standard view only. See Section 3.3 later in this chapter for details on manipulating tables in Layout view. 3.2.1.1 Selecting tablesTo select an entire table in Standard view, click on the table's upper-left corner or one of its edges when the pointer changes to a "crossed arrows" cursor. Other ways to select a table include clicking anywhere in the table, and then:
3.2.1.2 Selecting cells, columns, or rowsTo select cells, rows, and columns in Standard view, use the following:
3.2.2 Modifying Table and Cell Properties in Standard ViewTable attributes differ in Standard view and Layout view. Figure 3-2 shows the Property inspector as it appears when a table is selected in Standard view, allowing you to modify table attributes. Figure 3-2. Property inspector showing table properties in Standard view When a cell, row, or column is selected in Standard view, the Property inspector can be used to modify the attributes shown in Figure 3-3. Figure 3-3. Property inspector showing cell properties in Standard view 3.2.2.1 Height and width of tables, rows, and columnsOnce a table is selected in Standard view, you can resize it using the resize handles (provided it doesn't overlap with other elements on the page). Setting the table width or height to a percentage causes the table to resize dynamically based on the browser window size. A table's rows and columns can be set to a fixed size in pixels or a percentage of the current table size. Select a row or column and then use the Height and Width fields (in the Property inspector) to set either a fixed dimension or a percentage. (Unlike the table properties, there is no pop-up menu for the units, so enter a percent sign, such as "50%".) Select the entire table and use the Convert Widths to Pixels or Convert Widths to Percentages button in the Property inspector (indicated in Figure 3-2) to convert the column widths between fixed and adjustable dimensions. To resize a table's rows and columns manually, click and drag the border that separates adjacent rows or columns (the cursor changes to parallel lines when the pointer is positioned appropriately). Resizing columns and rows sets the height and width attributes in the HTML code to fixed dimensions (i.e., any percentage-based dimensions are converted to pixel dimensions). Select the entire table and use the Clear Height Values and Clear Width Values buttons in the Property inspector, as shown in Figure 3-2, to reset the table dimensions and start over. The column width and height determine the wrapping of text and graphics within the table. To create a precise layout, such as that used with sliced images, you must use fixed-cell and table dimensions. If a fixed-width table is too narrow, its contents will wrap even on wide monitors; furthermore, large blank spaces may appear on one or both sides of the table, as shown in Figure 3-4. Figure 3-4. A narrow table, left-, center-, and right-justified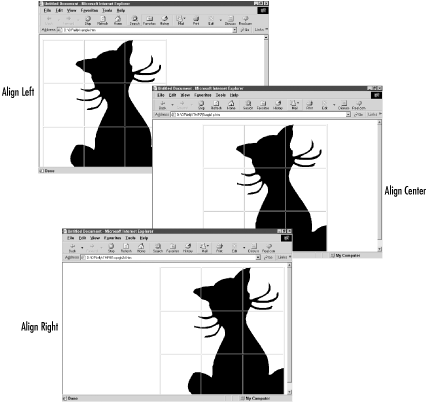 Assigning percentages for the column widths (in Standard view) or using Dreamweaver's Autostretch feature (in Layout view) creates so-called fluid tables. Fluid tables avoid the excess whitespace problem; however, they don't offer precise control over layout. To achieve both precision and flexibility, Dreamweaver allows you to create a table containing both fixed-width columns and adjustable-width columns that take up the remaining space. To make a table fill the browser window using Standard view, you must select the entire table and set its width to 100%. (As discussed in Section 3.3.2.1 later in this chapter, setting one column to Autostretch in Layout view resizes the entire table to fit the browser window.) The following code creates a table that fills the browser window. One of the columns uses all of the width remaining after the fixed-width columns are allotted their space. <table width="100%">
<tr>
<td width="100%" height="19"> Add content here.</td>
<td width="1" valign="top">Add content here.</td>
<td width="1">Add content here.</td>
</tr>
</table>
You can create this code by setting the table width in the Property inspector to 100%. Then, specify a fixed width for two of the columns and a percentage (100%) for the final column, again using the Property inspector.
3.2.2.2 Background images and colorsBoth tables and individual cells can have background colors and images applied separately. If the table is too small, the background image will be cropped. If the table is larger than the background image, the image will be tiled (i.e., repeated). Netscape Navigator browsers don't display table background images properly; instead, they tile the image within each cell, as shown in Figure 3-5. Figure 3-6 shows a table background image displayed as intended in IE5.5. Figure 3-5. Netscape Navigator 6 with a table background image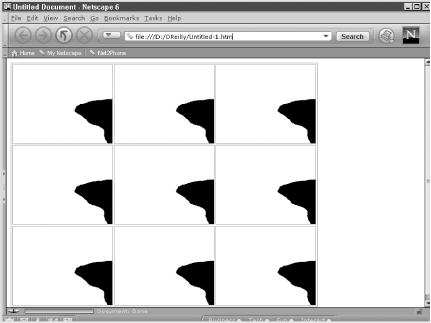 To make a table with background images appear the same in both Internet Explorer and Netscape Navigator, you will need to split your main background image into a grid matching the cell dimensions of the table, and then apply portions of the main image to each individual cell. By converting your background image into a series of smaller images to be applied separately to each cell, your table code will appear as follows and will display correctly in the major browsers: <table width="75%" border="0"
cellspacing="1" cellpadding="0">
<tr>
<td background="img1.gif"
width="100" height="100"> </td>
<td background="img2.gif"
width="100" height="100"> </td>
</tr>
<tr>
<td background="img3.gif"
width="100" height="100"> </td>
<td background="img4.gif"
width="100" height="100"> </td>
</tr>
</table>
Figure 3-6. Internet Explorer 5.5 with a Table background image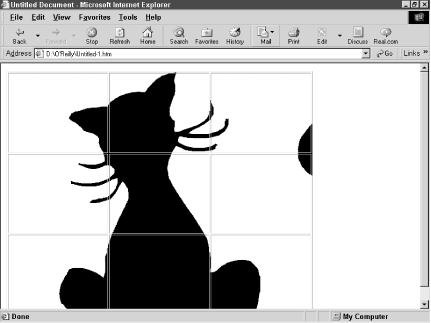 When breaking an image into smaller pieces to use as a background image for table cells, be sure to specify both a height and width property for each cell to avoid cropping the images. You can control the horizontal and vertical repetition of your background image(s) by using the stylesheet properties background-attachment, background-repeat, and background-position, as discussed in Chapter 10. 3.2.2.3 Border propertiesDreamweaver can set the colors and widths of table and cell borders, but Netscape Navigator and Internet Explorer interpret the border settings differently, as shown in Figure 3-7 (in which the border color is dark gray #333333). Prior to DW4, the dark and light colors of the table border could be set separately using the properties bordercolorlight and bordercolordark. Because these values were interpreted differently by different browser versions and used only by Netscape Navigator, DW4 dropped this feature. Figure 3-7. Table border color differences between browsers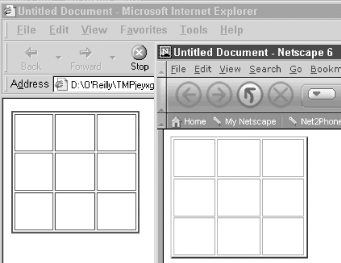 3.2.3 Merging and Splitting CellsDreamweaver automatically adjusts your HTML <table> tag when you merge adjacent cells or split a cell in two (also known as spanning and unspanning cells). Cells can be split and merged in Standard view, but not in Layout view. To merge table cells, select two or more adjacent cells, and then:
You can use merged cells to create elaborate layouts. To reduce download size, use stylesheets, background colors, or text to create graphical effects when possible. Use images only for effects that can't be created with more bandwidth-efficient techniques. See Section 13.3.1 in Chapter 13 for an example of a complex graphical interface created using a table. To split a table cell, select only one cell, and then:
In Standard view, splitting a cell automatically creates a new row or column in your HTML code, if necessary. (In Layout view, the grid is adjusted whenever cells are resized or added with the Draw Layout Cell tool.) |
|
|