|
|
3.3 Tables in Layout ViewDreamweaver 4 introduced a new Layout view for working with tables visually, but Layout view is largely unrelated to the traditional use of tables for displaying data in rows and columns. Instead, it uses legacy HTML support for tables to simulate modern page layout capabilities, even in older browsers. 3.3.1 Drawing Tables in Layout View Enter Layout
view using the Layout View button in the Objects panel
or by choosing View In Standard view, cells are part of a row or column; in Layout view, however, the individual cells act as arbitrary layout areas. In Standard view, cells are created when you create your table (in just one step, which is easy, but doesn't offer much control). In Layout view, you must create a table manually using the Draw Layout Table tool and then add cells using the Draw Layout Cell tool (requiring multiple steps, but offering more control). The Draw Layout Cell and Draw Layout Table tools in the Objects panel, which are active in Layout view only, are shown in Figure 3-8. Figure 3-8. Layout table object buttons Use the Draw Layout Table tool to create a rectangular table by clicking in the Document window and dragging the mouse cursor down and to the right. The table is placed in the upper-left corner of the page by default. To adjust the horizontal alignment of a table use the Property inspector as discussed earlier. A layout table can act as the container for subsequent (nested) tables. Additional layout tables can be added below existing tables. Each layout table is indicated by a green tab in its upper-left corner. Use the Draw Layout Cell tool to create cells within a table.
If you draw a layout cell prior to drawing a layout table, Dreamweaver automatically creates a layout table to enclose it, as shown in Figure 3-9. (In this case, Dreamweaver also adds a proprietary mm:layoutgroup="true" attribute to the <table> tag, which you can safely delete in Code view or by using the Quick Tag Editor.) Figure 3-9. A single-cell layout table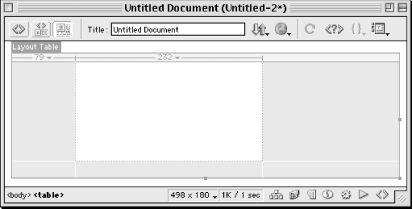 As seen in Figure 3-10, as you add table cells, a grid is formed. Unoccupied areas remain gray. The width of each column is shown at the top of the table. Click the small arrow next to the column width number to access a pop-up menu that controls cell width. Figure 3-10. Layout table cells create a grid as they are drawn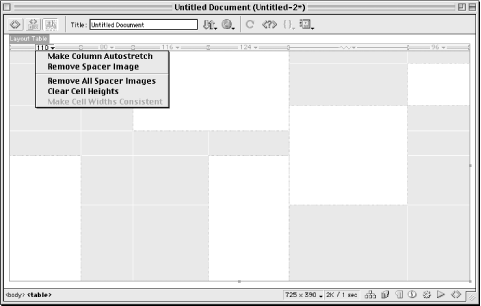 If you are accustomed to Standard table-editing mode, the new gestures in Layout view may require some practice. Some hints about layout tables and cells may eliminate any confusion:
3.3.1.1 Aligning images with a tracing imageDreamweaver can display a tracing
image
to assist in laying out a
complex page or table (the tracing image appears while working in
Dreamweaver, but not within a web browser). Add a tracing image using
Modify The tracing image appears behind any content in the Design pane of the Document window. Use the slider in the Page Properties dialog box to control the tracing image's transparency. See Section 13.3.1 in Chapter 13 for an alternative method of creating a complex page layout. 3.3.2 Table and Cell Properties in Layout ViewThe table and cell formatting options in Layout view differ somewhat
from those available in Standard view. The options available in
Layout view are explained in Table 3-2 and shown
in Figure 3-11. You can also access some of these
options from the pop-up menu accessed by clicking the small arrow
button next to the column width measurement at the top of each
column. You can configure Layout view preferences under
Edit
Figure 3-11. Property inspector showing table properties in Layout view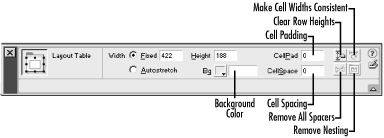 3.3.2.1 Autostretch and spacer imagesCreating an autostretched column allows the width of your table to resize automatically to fit the user's browser window. If a column is set to Autostretch, its width is indicated by a wavy line (see Figure 3-10).
Dreamweaver uses spacer images (1 x 1 pixel transparent GIF files) in Layout view to maintain column widths. Spacer images are added in the bottom row of fixed-width columns of a table when an Autostretch column is created. The spacer added to each column is resized to the desired width so that each cell in that row maintains the column's width, regardless of the column's other contents. The spacer images prevent the autostretched column from squeezing out other columns. When you first add an Autostretch column, you will be prompted to select a spacer image file. Either create a new one or choose an existing one (avoid the "Don't Use Spacer Images for Autostretch Tables" option).
Double horizontal lines appear in the column heading for columns containing spacer images (see Figure 3-10). Use the options in Table 3-2 to remove spacer images from one or more columns (typically to start over when working with a table that has gotten out of control). 3.3.3 Creating Nested Tables in Layout ViewTo create a nested table in Layout view:
You can nest tables within tables several levels deep provided that you draw the new table within the gray area of an existing table. You can also draw layout cells within nested tables or in unoccupied areas adjacent to nested tables.
3.3.4 Converting Between Tables and Layers
Layers provide an alternative method of
laying out elements on a web page. Although web developers
traditionally use tables to create documents that will work with a
wide range of browsers, modern
browsers (NN 4.0 or IE 4.0 or later)
support layers. DW4 quickly converts between these two formatting
options, using Modify For example, if you select the table shown in Figure 3-8 and choose Modify Figure 3-12. The Convert Tables to Layers dialog box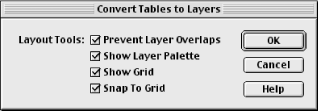 Dreamweaver creates layers from only the table cells that contain content (text, images, or a background color or image). The size of the layers created depends on the size of the cell's contents. For example, a cell with a background color applied would have the exact dimensions when rendered as a layer that it had as a table cell; a layer derived from a cell containing text would shrink to the size of the text. You can see these effects in Figure 3-13. Figure 3-13. Table cells converted to layers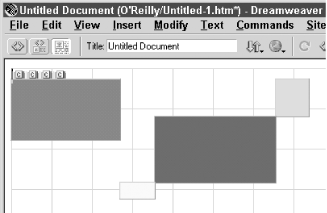 When converting layers to a table using Modify Figure 3-14. Layers converted to table cells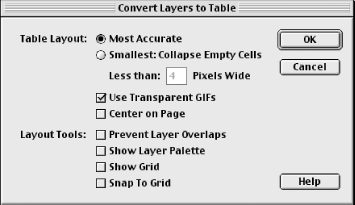 You can also convert layers to a table using the
File |
|
|