|
|
< Day Day Up > |
|
11.1 All You Really Need Is plugin.xmlCreating a very simple plug-in is easy enough—all you need is a working plugin.xml. To show how this works, you can use a text editor to create a new plug-in manifest, plugin.xml, for a fictional plug-in named org.eclipsebook.first. In this case, we'll set the plug-in's name, ID, version number, and the name of its provider like this: <?xml version="1.0" encoding="UTF-8"?>
<plugin
id="org.eclipsebook.first"
name="First Plug-in"
version="1.0.0"
provider-name="Steve">
</plugin>
Just store
plugin.xml in
plugins\org.eclipsebook.first_1.0.0 and restart
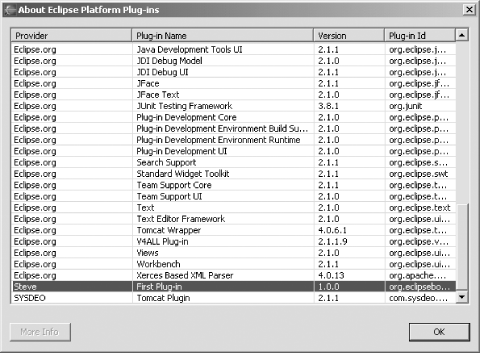
Eclipse. You can find the new plug-in in the plug-in registry, which
is where Eclipse holds data about all current plug-ins. To see that
data, select Help Figure 11-1. The plug-in registry You can see the new, fictional plug-in in the registry, near the bottom.
That's a nice exercise but it doesn't go very far in extending Eclipse. Developing a real plug-in involves creating multiple files, including multiple code files. The good news is that Eclipse has built-in wizards to help you out. |
|
|
< Day Day Up > |
|