|
|
< Day Day Up > |
|
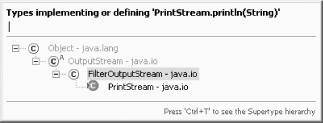
13.4 Changes to the Java Development ToolsThe major enhancements in Eclipse 3.0 are to the JDT, as you might expect. The changes so far are mostly for usability and convenience, and they're designed to help you program Java better. It's not clear which ones will be around in the final release of Eclipse 3.0, but we'll take a look at what's available now. 13.4.1 Quick Hierarchy ViewsYou can now select a type, method, or package reference in the JDT editor and press Ctrl+T to see a quick type hierarchy view, as appears in Figure 13-13. Figure 13-13. Showing a quick hierarchy
You can also now open a view that
shows a method call hierarchy by selecting Navigate 13.4.2 Creating Constructors from FieldsYou can also create a constructor that fills various fields easily in Eclipse 3.0. For example, say you added a String field to a class this way: public class Ch13_01 {
private String text;
public static void main(String[] args) {
System.out.println("Hello from Eclipse 3.0");
}
}
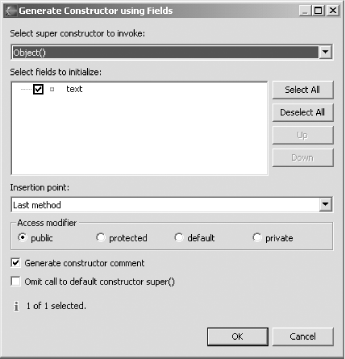
To create a constructor that fills this
field in Eclipse 3.0, select Source Figure 13-14. Creating a constructor using a field You select fields you want to fill in the constructor and click OK; in this case, here's the constructor created: public class Ch13_01 {
private String text;
public static void main(String[] args) {
System.out.println("Hello from Eclipse 3.0");
}
/**
* @param text
*/
public Ch13_01(String text) {
super( );
this.text = text;
}
}
13.4.3 Creating Factory Methods
You can go further as well—you
can convert your constructor into a factory method with the new
Refactoring public class Ch13_01 {
private String text;
public static void main(String[] args) {
Ch13_01 ch13_01 = new Ch13_01("Hello");
System.out.println("Hello from Eclipse 3.0");
}
/**
* @param text
*/
public Ch13_01(String text) {
super( );
this.text = text;
}
}
Selecting the constructor call and the Refactoring Figure 13-15. Creating a factory method Clicking OK creates a new factory method, createCh13_01, replaces the call to the constructor with a call to that method, and makes the original constructor private: public class Ch13_01 {
private String text;
public static void main(String[] args) {
Ch13_01 ch13_01 = createCh13_01("Hello");
System.out.println("Hello from Eclipse 3.0");
}
public static Ch13_01 createCh13_01(java.lang.String text) {
return new Ch13_01(text);
}
/**
* @param text
*/
private Ch13_01(String text) {
super( );
this.text = text;
}
}
This is the general trend
in Eclipse 3.0—giving you more control over tasks you already
perform. For example, the dialog for the JDT
editor's Source
13.4.4 Smart Insert ModeThere's a new typing mode in the JDT editor—smart insert mode—in addition to the standard overwrite and insert mode. Smart insert mode adds functionality for Java programmers, such as automatically wrapping Java strings to code lines as you type them. You can toggle between these three modes by repeatedly clicking the Insert key and watching the status bar indicator (set to Smart Insert in Figure 13-8).
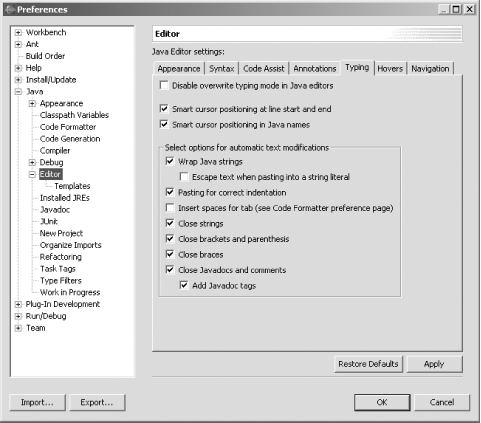
To configure smart insert mode, select
Window Figure 13-16. Configuring smart insert mode 13.4.5 Creating Block CommentsBesides commenting out blocks of code using single-line comments, you can also comment out code using Java block comments. For example, if you select this code: public class Ch13_01 {
private String text;
public static void main(String[] args) {
System.out.println("Hello from Eclipse 3.0");
}
}
and then select the Source public class Ch13_01 {
private String text;
/* public static void main(String[] args) {
System.out.println("Hello from Eclipse 3.0");
}
*/}
To uncomment a block,
select it and then select Source 13.4.6 New Views
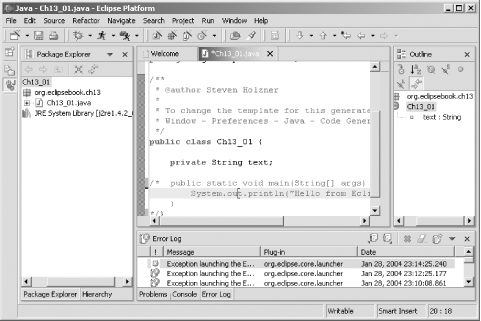
Eclipse 3.0 also comes with some new
views: Javadoc, Error log, and Declaration. You can show these as you
would any view, using Window Figure 13-17. The Error log view 13.4.7 Additional ChangesBesides the changes to the JDT already discussed, there are plenty of other smaller changes. Here's an overview of the most significant of these:
There are plenty of plans for new improvements to Eclipse 3.0 in upcoming releases. Here's a sampling:
|
|
|
< Day Day Up > |
|