|
|
< Day Day Up > |
|
2.6 Customizing the Development EnvironmentOur last topic in this chapter is all about customizing your development environment. Eclipse is easy to customize, starting from the most basic—you can move any view, editor, or toolbar around simply by dragging it.
You can also customize how Eclipse will generate code for you. For example, the default code generation style doesn't place opening curly braces on their own lines: public void printer( ) {
System.out.println("No worries.");
}
However, your programming style might be more like this, where each curly brace does get its own line: public void printer( )
{
System.out.println("No worries.");
}
You can customize this with
the Windows Figure 2-29. Customizing code generation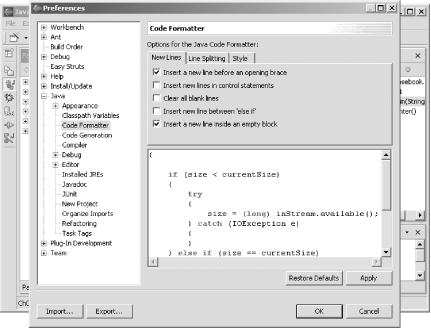 Here's another way you can customize how Eclipse generates code. When you create a new file, this kind of comment is inserted automatically: /* * Created on Oct 17, 2003 * * To change the template for this generated file go to * Window>Preferences>Java>Code Generation>Code and Comments */ As
this text says, you can change this with the Window Figure 2-30. Configuring comment templates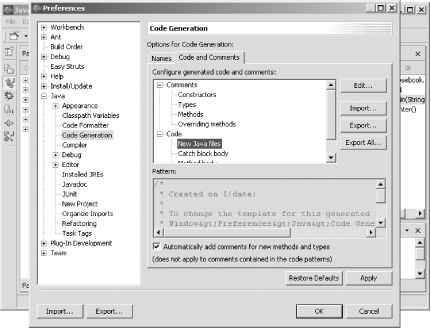
You can even create new code
assist items in Eclipse. For example, say you want to create a
shortcut for the code needed to print out the current date. To do
that, select Window Figure 2-31. Creating a code assist shortcut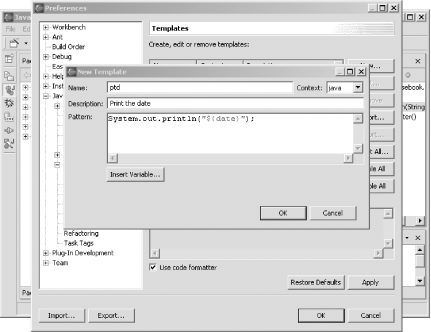 Now when you type ptd in code, followed by Ctrl+Space, code assist will enter the code needed to print out the current date, as you see in Figure 2-32. In fact, if you type p, followed by Ctrl+Space, code assist will list all its options that begin with the letter "p"—including ptd. Figure 2-32. Customizing code assist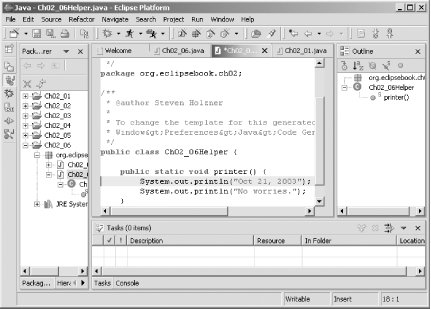 Another way of customizing your development environment is to create working sets. Working sets let you limit what appears in the Package Explorer. For example, to create a working set consisting only of the projects Ch02_01 and Ch02_02, click the Package Explorer's pull-down menu (that's the inverted black triangle at the top of this view) and select the Select Working Set item, opening the Select Working Set dialog. To create a new working set, click the New button and select the Java item in the Working Set Type box in the New Working Set dialog. Then click the Next button. Now you can select the projects for this working set, as you see in Figure 2-33. In this case, we'll create a working set named 1And2Only and select only the Ch02_01 and Ch02_02 projects for this working set. Figure 2-33. Creating a working set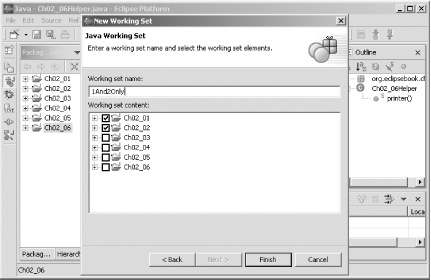 Clicking Finish creates the new working set and opens the Select Working Set dialog. Select the 1And2Only working set and click OK. When you do, only the Ch02_01 and Ch02_02 projects appear in the Package Explorer, as you see in Figure 2-34. Figure 2-34. Using a working set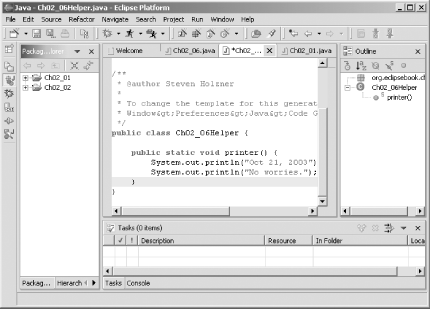 To restore all projects to the Package Explorer, select the Deselect Working Set item from the Package Explorer's pull-down menu.
In fact, you can
customize entire perspectives as well. To do that, select the
Window Figure 2-35. Customizing a perspective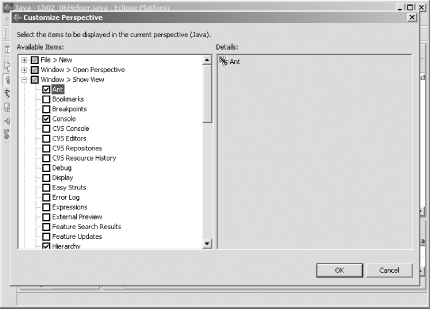
And that completes our look at some of the extraordinary power that Eclipse places at your fingertips for Java development. In the next chapter, we're going to discuss testing and debugging your Java code. |
|
|
< Day Day Up > |
|