|
|
< Day Day Up > |
|
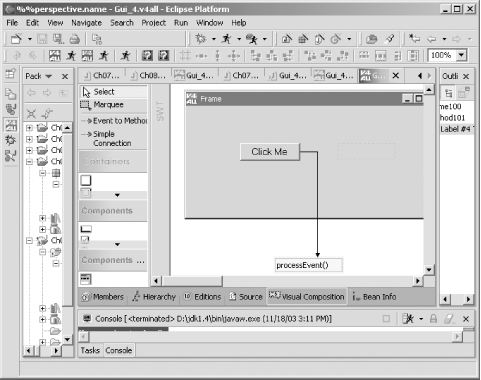
7.6 Using V4ALL with SWTYou can also use plug-ins like V4ALL to create SWT code, which can make things a little easier because you can drag controls where you want them. In Figure 7-5, you can see an example that works much as our Swing example worked in the previous chapter. In this case, we've created a new V4ALL editor in a project named Ch07_05, just as we did in Chapter 6óbut here, we're going to generate code for SWT, not Swing. Figure 7-5. Designing an SWT application with V4ALL After creating the new V4ALL editor, add a button and a label to the new window, change the caption of the button to Click Me, and clear the caption of the label. Next, drag a method to the whiteboard, and name that method processEvent as you see in Figure 7-5. Connect that method to the button and, using the properties view as we did in Chapter 6, connect the processEvent method to the button's Action Performed event. To generate the code for an SWT
application, start by adding swt.jar to the
build path, and select the Code Generation import org.eclipse.swt.*; import org.eclipse.swt.graphics.*; import org.eclipse.swt.widgets.*; import org.eclipse.swt.custom.*; import org.eclipse.swt.layout.*; Then add the code to the processEvent method to set the text in the label to "No worries." when the user clicks the button: public void processEvent( ){
// user code begin {1} Swing
// user code end
// user code begin {1} SWT
ivjLabel100.setText("No worries.");
// user code end
// user code begin {1} HTML
// user code end
// user code begin {1} Eclipse
// user code end
// user code begin {1} C#
// user code end
}
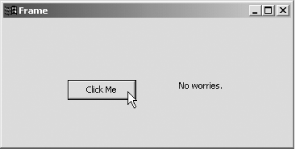
Finally, create a launch configuration for the Gui_1 class in Gui_1.java, setting the VM arguments to -Djava.library.path="d:\eclipse211\eclipse\plugins\org.eclipse.swt.win32_2.1.1\os\win32\x86" as we've done throughout this chapter. And that's itówhen you run this new SWT application, you should see the results in Figure 7-6, where you can click the button and the text message will appear in the label. Figure 7-6. Running the V4ALL SWT application That completes our first chapter on SWT; we got our start with SWT and several important controls. There's a lot more to SWT, however, and we're going to continue our exploration in the next chapter with new controls, such as menus and sliders. |
|
|
< Day Day Up > |
|