|
|
< Day Day Up > |
|
9.1 Installing and Testing TomcatYou can get the Tomcat web server at http://jakarta.apache.org/tomcat/; the current release version as of this writing is 4.1.29. Downloading and installing Tomcat isn't hardójust unzip or untar it, which creates this directory structure: jakarta-tomcat-4.1.29 |_ _bin Binary executable files |_ _common Classes available to internal classes and web apps | |_ _classes Common Java classes | |_ _endorsed Endorsed Java classes | |_ _lib Common Java classes in Java Archive (JAR) format |_ _conf Configuration files (such as passwords) |_ _logs The server's log files |_ _server Internal Tomcat classes |_ _shared Shared files |_ _temp Temporary files |_ _webapps Directory for Web applications |_ _work Scratch directory for holding temporary files For web developers, the most important directory here is the webapps directory, which is where you store files to make them accessible to client browsers. We're going to see that directory at work throughout this chapter. As we develop our web applications, we're going to start by running Tomcat outside Eclipse; later in this chapter, we'll take a look at how to launch it while working inside Eclipse. Our first goal is to get Tomcat working. Before running Tomcat from the command line, you must set these two environment variables:
You can set these environment variables from the command prompt as in this example: set JAVA_HOME=C:\jdk1.4. (In the Unix tcsh shell, use setenv instead.) On most operating systems, you can also set environment variables in a more permanent way using control panel dialogs or by setting configurations.
After setting these two environment variables, you can run Tomcat by changing directories to Tomcat's bin directory and typing startup in Windows, or by running startup.sh in Unix. In Windows, a new DOS window will open, displaying initialization messages. When you want to shut Tomcat down, type shutdown in Windows or run shutdown.sh in Unix.
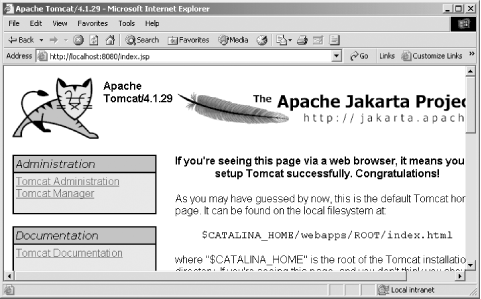
Now that Tomcat is running, open a browser and navigate to http://localhost:8080, which should open Tomcat's Welcome page, as you see in Figure 9-1. The "localhost" part of this URL is what you use for local web servers (and it corresponds to an IP address of 127.0.0.1), and 8080 is the port number; web servers usually use port 80, but Tomcat uses 8080 to avoid conflicts with other servers. Figure 9-1. The Tomcat Welcome page |
|
|
< Day Day Up > |
|