|
|
< Day Day Up > |
|
9.5 Connecting to a JavaBeanJSP files are able to connect to compiled Java code using JavaBeans, and developing those applications are no problem now that you know how to use linked folders. Here's an example, the Ch09_04 project. In this case, we'll use the bean in Example 9-6, which supports a property named msg that returns the message "No worries!" Example 9-6. A JavaBeanpackage org.eclipsebook.ch09;
public class Ch09_04 {
private String message = "No worries!";
public void setMessage(String msg)
{
this.message = msg;
}
public String getMessage( )
{
return this.message;
}
public Ch09_04( )
{
}
}
This code's output, Ch09_04.class (note that you don't need servlet.jar in the build path here), goes into the webapps\Ch09\WEB-INF\classes directory, so use that directory as the output directory. After entering the code, compile the project to create Ch09_04.class. In JSP, you can connect to the bean code in a variety of ways, including instantiating an object of the Ch09_04 class using Java in a JSP scriptlet. The recommended way of doing things, however, is to use the JSP jsp:useBean element to create a JavaBean object. Then use the jsp:getProperty element to get the value of a bean property, and use the jsp:setProperty element to set a bean property's value. You can see how this works in Example 9-7, where we're reading the current property of the bean's msg property, setting it to a new value, and reading that new value. Example 9-7. Connecting to a JavaBean<HTML>
<HEAD>
<TITLE>Setting a Property Value</TITLE>
</HEAD>
<BODY>
<H1>Setting a Property Value</H1>
<jsp:useBean id="bean1" class="org.eclipsebook.ch09.Ch09_04" />
The message is: <jsp:getProperty name="bean1" property="message" />
<BR>
<jsp:setProperty name="bean1" property="message" value="Hello again!" />
Now the message is: <jsp:getProperty name="bean1" property="message" />
</BODY>
</HTML>
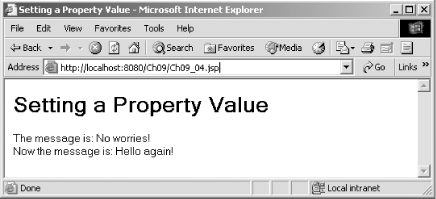
This JSP displays the original message in the msg property and the new value after it's been set. Using a linked folder, store this new JSP file in the webapps\Ch09 directory, and navigate to http://localhost:8080/Ch09/Ch09_04.jsp, as you see in Figure 9-8. Figure 9-8. Connecting to a JavaBean At this point, then, we've been able to develop online Java code in Eclipse and write, compile, and install it in Tomcat. All that we've had to do outside Eclipse is start and stop Tomcat. And it turns out that you can do that from inside Eclipse, too. |
|
|
< Day Day Up > |
|