|
|
< Day Day Up > |
|
Recipe 11.9 Interfacing to JavaBeans11.9.1 ProblemYou want to develop JavaBeans and connect them to JSPs in Eclipse. 11.9.2 SolutionDevelop the JavaBean code and the JSPs in place. To do that, simply set your project's output folder to the WEB-INF\classes directory in which you want the bean code, and create the JSP that uses the bean as a linked file in Eclipse. 11.9.3 DiscussionYou can compile Java code into JavaBeans and access that code from JSPs. Now that you know how to use linked files, developing applications with JavaBeans is no problem. As an example, take a look at Example 11-6. This bean sets up a property named text that holds the string This bean is functional.. Example 11-6. A JavaBeanpackage org.cookbook.ch11;
public class BeanClass {
private String text = "This bean is functional.";
public BeanClass( )
{
}
public void setText(String message)
{
text = message;
}
public String getText( )
{
return text;
}
}To set up this example, create a new project named Bean and send its output to the webapps\ch11\WEB-INF\classes directory, as explained in Recipe 11.6 on creating a servlet in place. When you've entered the code for this bean, build the project, creating and installing BeanClass.class. The JSP file that connects to this bean appears in Example 11-7. Here, we use the JSP <jsp:useBean> element to create a JavaBean object and then the <jsp:getProperty> element to get the value of a bean property. Example 11-7. Interfacing to a JavaBean<HTML>
<HEAD>
<TITLE>Setting a Property Value</TITLE>
</HEAD>
<BODY>
<H1>Setting a Property Value</H1>
<jsp:useBean id="bean1" class="org.cookbook.ch11.BeanClass" />
Got this from the bean: <jsp:getProperty name="bean1" property="text" />
</BODY>
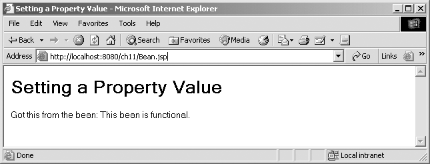
</HTML>This JSP displays the original message in the msg property and the new value after it's been set. Treating this file as a linked file, store this new JSP file in the webapps\Ch11 directory, and navigate to http://localhost:8080/ch11/Bean.jsp, as shown in Figure 11-9. Figure 11-9. Connecting to a JavaBean As you can see in the figure, the JSP file does indeed connect to the bean. Developing applications using output folders and linked files in this way is no problem. 11.9.4 See AlsoRecipe 11.3 on creating JSP files; Chapter 6 in JavaServer Pages (O'Reilly); Chapter 7 in the Java Servlet and JSP Cookbook (O'Reilly); Chapter 9 in Eclipse (O'Reilly). |
|
|
< Day Day Up > |
|