|
|
< Day Day Up > |
|
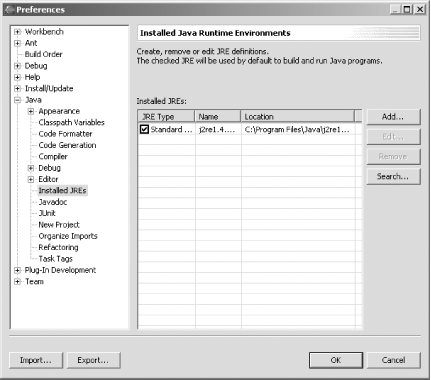
Recipe 4.8 Selecting the Java Runtime for Builds4.8.1 ProblemYou want to target your code at a particular JRE, or change the default JRE that Eclipse uses. 4.8.2 SolutionYou can specify what Java runtime you want Eclipse to use by
selecting Window 4.8.3 DiscussionWhen you first run Eclipse, it searches for installed Java runtimes,
which means it might not use the one you want to use. For example,
Eclipse might want to use the outdated JRE that came with your
browser instead of the new Java SDK you've just
downloaded. To specify what runtime to use, select Window Figure 4-14. Choosing a JRE
4.8.3.1 Setting the JVM using the -vm switchEclipse might not start if the JRE it finds is too old. In this case, start Eclipse from the command line and use the -vm switch, specifying the JRE you want to use. For example, you might type: eclipse -vm c:\jre1.4\bin\javaw.exe After Eclipse starts, set the JRE you want to use from then on. 4.8.4 See AlsoRecipe 4.9 on running code; Chapter 2 of Eclipse (O'Reilly). |
|
|
< Day Day Up > |
|