|
|
< Day Day Up > |
|
8.10 Keeping Your Red Hat Enterprise Linux System Up to DateRed Hat provides a service known as Red Hat Network (http://rhn.redhat.com), designed to help you keep your Red Hat Enterprise Linux system up-to-date and secure. Access to Red Hat Network is included with your subscription to Red Hat Enterprise Linux. If you purchase Red Hat Professional Workstation, you receive a one-year subscription to Red Hat Network. If you're using Fedora Core, you can keep your system up to date by using Yum, which is described in Section 8.11. The Red Hat Network provides access to security alerts, bug fix alerts, and enhancement alerts published by Red Hat. Updated packages can be downloaded or automatically installed via the Red Hat Update Agent. The Red Hat Network is of significant benefit to administrators of multiple systems, who might otherwise have difficulty applying patches to close security loopholes and fix problems quickly. 8.10.1 Using Red Hat NetworkTo use Red Hat Network, your computer must be able to access the Internet. To set up your computer, you must perform two steps:
Once your computer is set up to use Red Hat Network, updates can be accomplished automatically based on a schedule or manually, by using the Red Hat Update Agent. The following sections describe these procedures as they existed at the time of writing. However, Red Hat may revise the operation of Red Hat Network at any time. For more information on using Red Hat Network, see the Red Hat Network User Reference Guide, available at http://www.redhat.com/docs/manuals/RHNetwork. 8.10.1.1 Signing upTo sign up for Red Hat Network, point your browser to the main Red Hat Network web page, http://rhn.redhat.com. Then click the link marked "Create Account." The web page shown in Figure 8-6 appears. Figure 8-6. The Red Hat Network Create Account web page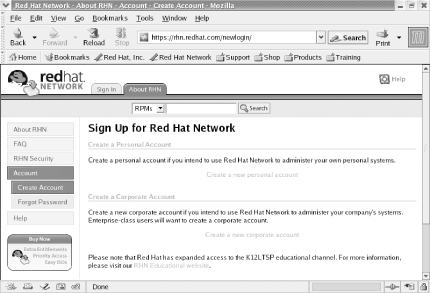 Click the link marked "Create a Personal Account." The web page shown in Figure 8-7 appears. Fill in the requested information and then click the Create Account button at the bottom of the form. Figure 8-7. The Red Hat Network personal account sign-up page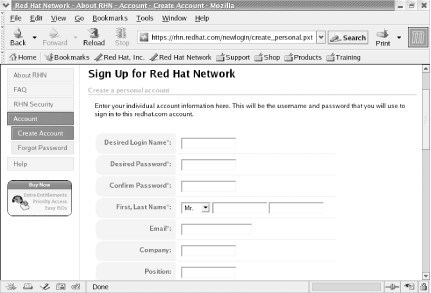 8.10.1.2 Activating your productWhen you purchase Red Hat Enterprise Linux WS, you should receive an email or printed card explaining how to activate your product. The instructions include a product ID that uniquely identifies your license. Before creating a system profile, you should activate your product by following the instructions you received.
8.10.1.3 Creating a system profileOnce you've activated your product, you can create a profile describing your system. To do so, click the Red Hat Network Alert Notification Tool icon that appears near the right of the desktop panel. If you've not yet created a profile, the icon will resemble a red ball with a superimposed exclamation mark. Otherwise, it may take the form of a green, blue, or gray ball. Clicking the Notification Tool icon starts a configuration dialogue. First, the dialogue asks you to read and accept the Red Hat Network terms of service. Then, it presents the Proxy Configuration dialog box (Figure 8-8). Figure 8-8. The Proxy Configuration dialog box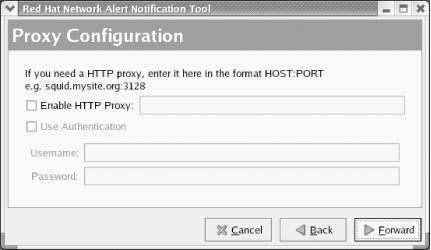 If your computer is behind a firewall that requires you to use a proxy sever to access the Web, you must enable the HTTP proxy and specify its hostname and port. Most users don't require a proxy. If you suspect that you do, you can likely obtain the proper information by inspecting the configuration of your Windows web browser, if any. Otherwise, you can obtain the necessary configuration information from your network administrator. After you complete the dialogue, the Configuration Complete dialog box appears. Click Apply and the Notification Tool will attempt to access Red Hat Network. Unless you've already configured a profile for your system, the Red Hat Network Registration dialog box shown in Figure 8-9 appears. Figure 8-9. The Red Hat Update Agent dialog box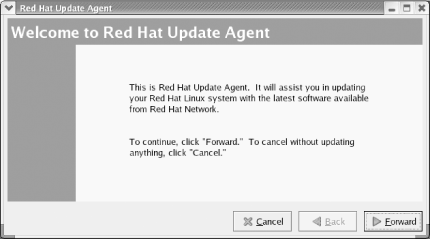 If the dialog box does not appear, you can manually initiate the registration process. To do so, open a terminal window, become root, and issue the command: rhn_register To register your computer with Red Hat Network, click Forward, review Red Hat's privacy statement and, if you concur with the statement, click Forward again. The Login dialog box (Figure 8-10) appears. If you created a Red Hat Network account as instructed earlier, enable the radiobutton labeled Use Existing account; otherwise enable the radiobutton labeled Create New Account. Specify your account information and click Forward. Figure 8-10. The Login dialog box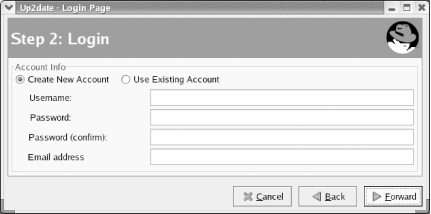 The Register a System ProfileHardware dialog box appears (Figure 8-11). Specify a name for your PC and click Forward. Figure 8-11. The Register a System ProfileHardware dialog box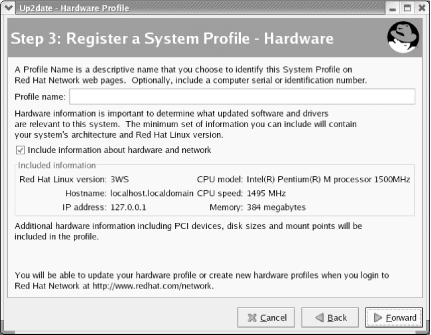 The Register a System ProfilePackages dialog box appears, as shown in Figure 8-12. This dialog box allows you to conceal from Red Hat the identities of packages installed on your system. Since you can't use Red Hat Network to manage packages it isn't aware of, you should not generally conceal any package information from Red Hat Network. Click Forward to proceed. The Send Profile Information to Red Hat Network dialog box appears. Click Forward to transmit your system's profile. Figure 8-12. The Register a System ProfilePackages dialog box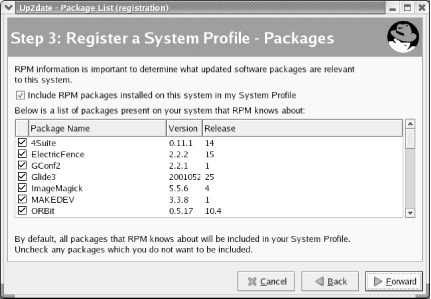 The Channels dialog box appears, as shown in Figure 8-13. This dialog box enables you subscribe to the channel that provides updates to Red Hat Enterprise Linux WS. Normally, only one channel should appear and you should not need to make changes to the defaults. Click Forward to continue.
Figure 8-13. The Channels dialog box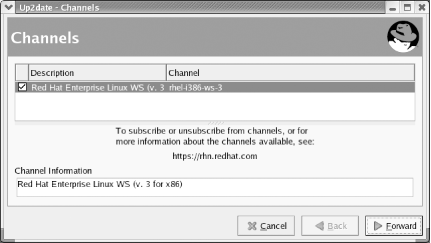 As shown in Figure 8-14, the Update Agent obtains and displays a list of installed packages for which updates are available. To update a package, enable the associated checkbox. To update all available packages, enable the checkbox labeled Select all packages. You can view information about the updates associated with a package by selecting the package name and clicking View Advisory. Select the packages you want to update and then click Forward. If you do not want to update any packages at this time, click Cancel. Figure 8-14. The available package updates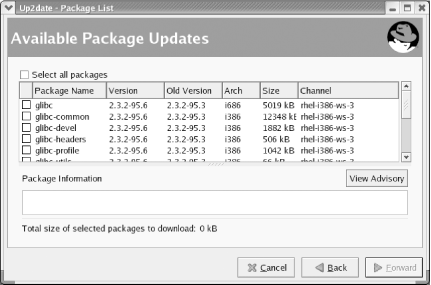
After you click Forward, the Update Agent will retrieve any specified packages and update your system. Separate dialog boxes present the progress and completion of package retrieval and installation. 8.10.1.4 Updating your systemAfter you initially set up your system to use Red Hat Network, you
can update it at any time. To do so, choose System Tools |
|
|
< Day Day Up > |
|

 Red Hat Network from the main
menu. Or, click the ball icon that represents the Notification Tool.
If the icon is red, new updates are available. To avoid a security
breach, you should download and install the updates right away.
Timely installation of updates is one of the most important measures
in defending your system against possible attack.
Red Hat Network from the main
menu. Or, click the ball icon that represents the Notification Tool.
If the icon is red, new updates are available. To avoid a security
breach, you should download and install the updates right away.
Timely installation of updates is one of the most important measures
in defending your system against possible attack.