|
|
< Day Day Up > |
|
Recipe 6.11 Creating Code Patches6.11.1 ProblemYou need to coordinate your development with another team of developers using a patch they can install to update their code. 6.11.2 SolutionCreate a code patch so that they can update their code. (Note that this is a code patch, not a binary patch. Eclipse can use this patch to update source code to match another version.) 6.11.3 DiscussionSay your version of the code displays the text "No problems here.": public static void main(String[] args)
{
System.out.println("No problems here.");
}But the code the other team is using from the CVS repository displays "No problems at all.": public static void main(String[] args)
{
System.out.println("No problems at all.");
}To update the other developers without changing version numbers, you can create a code patch. To create a code patch, Eclipse compares your local code to what's in the repository and creates a patch file holding the differences. To create a code patch using your local version of a file as the
version to which the patch will update the version in the repository,
save your file locally, right-click it, and select Team Figure 6-12. Creating a new patch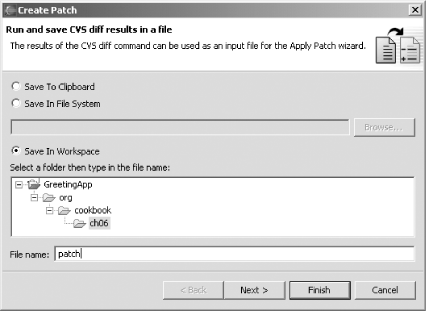 In this example, we'll save the file named patch in the current workspace, as shown in Figure 6-12. Click the Finish button to save the patch. This creates the text file named patch. Here's what that file looks like; you can see the line to remove marked with a - and the line to add marked with a +: Index: GreetingClass.java
===================================================================
RCS file: c:/repository/GreetingApp/org/cookbook/ch06/GreetingClass.java,v
retrieving revision 1.2
diff -u -r1.2 GreetingClass.java
--- GreetingClass.java 25 Feb 2004 16:34:07 -0000 1.2
+++ GreetingClass.java 25 Feb 2004 18:12:18 -0000
@@ -17,6 +17,6 @@
public static void main(String[] args)
{
- System.out.println("No problems at all.");
+ System.out.println("No problems here.");
}
}To apply the new patch to code that has not yet been patched,
right-click the file to be updated in Eclipse and select
Team Figure 6-13. The Apply Patch dialog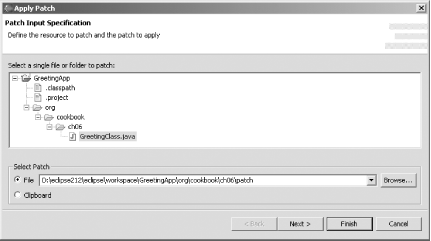 Click Next to open the dialog shown in Figure 6-14. In this dialog you can review the changes the patch will create in the local version of the file. As shown in the figure, Eclipse will change the line: System.out.println("No problems at all.");to: System.out.println("No problems here.");To apply the patch, click Finish. Figure 6-14. Accepting a patch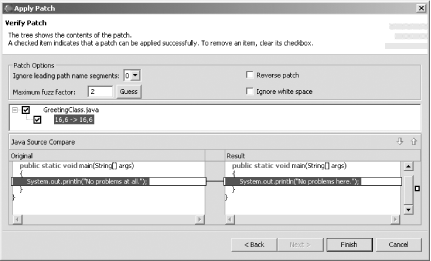 Applying the patch makes this change to the code in the other team's installation of Eclipse, as shown in Figure 6-15. Note that the version number of the file was not changed, but the file was updated with the new code. Figure 6-15. Applying a code patch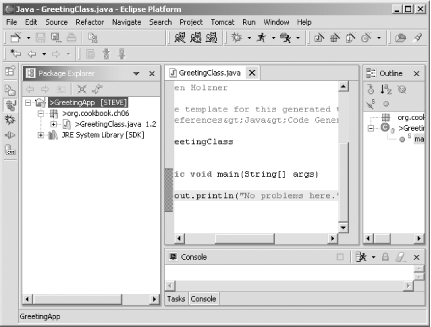 |
|
|
< Day Day Up > |
|
 Create Patch, opening the dialog shown in