|
|
< Day Day Up > |
|
Recipe 6.13 Creating CVS Branches6.13.1 ProblemYou want to develop a new version of your code, such as a beta version, by creating a new branch in your development tree. 6.13.2 SolutionAdd a new branch to your project's development tree
by selecting Team 6.13.3 DiscussionCVS also enables you to create new branches in your code's development tree. Such branches can act as alternate streams of development for your code; e.g., you might want to develop a new version of your code that uses prompts in another language. To create a branch, right-click a project and select Team Figure 6-19. Creating the Spanish_Version branch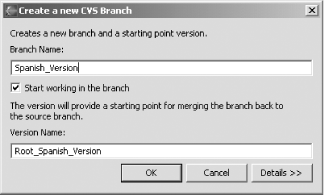 Clicking OK here opens the new branch in Eclipse, as shown in Figure 6-20 (note the project name in the Package Explorer). Figure 6-20. A new branch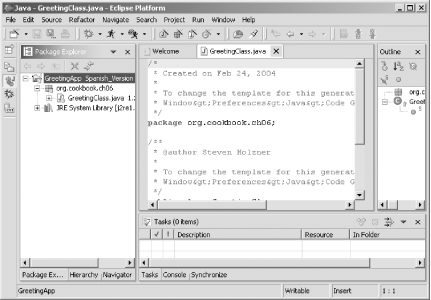 You can check out the new branch from the CVS Repositories view, as shown in Figure 6-21. Figure 6-21. The new branch in the CVS Repositories view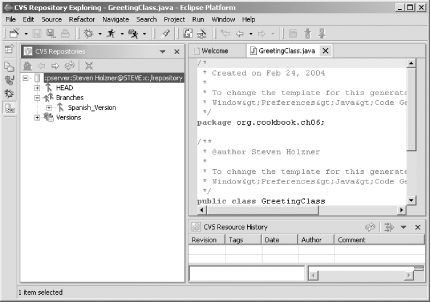 You can merge branches back into the main development stream when
needed. To do that, right-click the branch in the Package Explorer,
and select Team Figure 6-22. Selecting a root version to merge to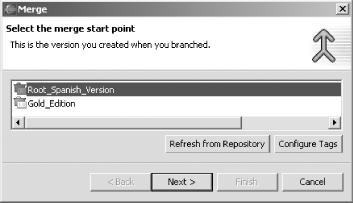 The next dialog enables you to select the branch from which you want to merge. In this case, select Spanish_Version, as shown in Figure 6-23. Figure 6-23. Merging a branch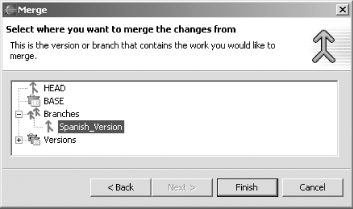 Clicking Finish in this dialog completes the merge operation. |
|
|
< Day Day Up > |
|
 Branch.