|
|
< Day Day Up > |
|
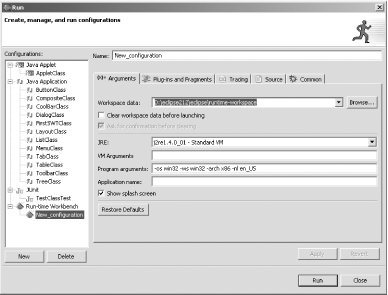
Recipe 12.4 Testing Plug-ins with the Run-time Workbench12.4.1 ProblemYou are developing a plug-in, and you don't want to keep stopping and starting Eclipse each time you want to test the plug-in. 12.4.2 SolutionLaunch a runtime workbench, which opens a new workbench with your plug-in already installed for testing purposes. 12.4.3 DiscussionIf you want to, you can build the plug-in created in the previous recipe and deploy it to the plugins directory (see Recipe 12.5). But for testing purposes, there's an easier way. All you have to do while developing a plug-in is to launch a runtime workbench, which will appear with your plug-in already installed. To launch a runtime workbench, highlight the plug-in project in the
Package Explorer, select Run
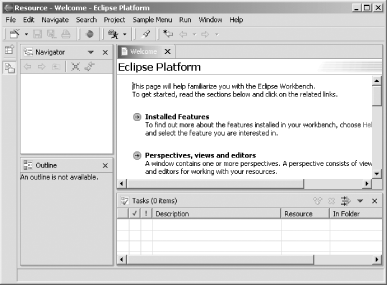
Figure 12-9. Creating a launch configuration This starts the Run-time Workbench. You can see the menu defined by the plug-in, Sample Menu, and the button (with the Eclipse icon) it adds to the toolbar in Figure 12-10.
Figure 12-10. A runtime workbench To verify things are working as they should, select Sample
Menu Figure 12-11. The plug-in's message Cool—you've now created and run an Eclipse plug-in. To quit, close the Run-time Workbench.
12.4.3.1 Eclipse 3.0Eclipse 3.0 offers a new option on the Plug-ins tab of the Run-time Workbench launch configuration dialog that enables you to select a set of plug-ins to include while testing your plug-in. And as far as testing goes, the Eclipse 3.0 PDE has a new launcher for JUnit-based unit test suites for plug-ins. In fact, that's one of the big changes in Eclipse 3.0: you can use JUnit to test plug-ins. |
|
|
< Day Day Up > |
|